Mastering the Pottery Wheel: Centering and Opening
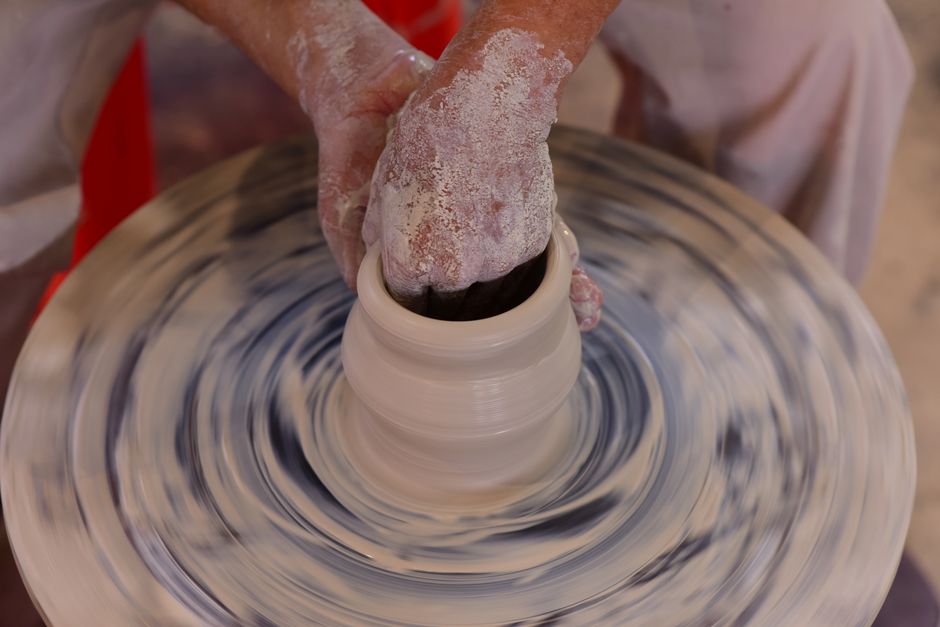
Centering clay on the pottery wheel is often described as the most important skill a thrower can develop. Without a centered mass, every subsequent step—from opening to pulling walls—becomes a struggle against wobble and instability. Yet centering is not a mysterious gift reserved for experts; it is a mechanical process that can be learned through clear steps and mindful practice. At Clay Muse, the emphasis is placed on understanding the physics of the wheel and the behavior of clay, so that each potter can develop a reliable, repeatable method. This article explores the foundational techniques of centering and opening, offering a process-oriented approach that prioritizes consistency over speed.
Before any clay touches the wheel, preparation plays a key role. The clay must be wedged thoroughly to remove air pockets and create a uniform consistency. A cone shape is then formed and slammed firmly onto the center of the wheel head, with the force of the slam helping to begin the adhesion process. Water is used sparingly at this stage—too much can soften the clay unevenly. The wheel is set to a moderate speed, typically between 100 and 150 revolutions per minute for most beginners, though this varies with personal preference and clay body. With hands wet but not dripping, the potter places both palms on either side of the clay, ready to apply steady, even pressure.
Understanding the Mechanics of Centering
Centering is essentially a process of displacing water from the clay mass while forcing it into a symmetrical, rotating column. The clay moves in response to the pressure of the hands, which act as guides rather than clamps. The left hand (for a right-handed thrower) typically braces against the side of the clay, while the right hand applies downward and inward pressure from above. This combination creates a force vector that pushes the clay toward the center of the wheel head. It is important to keep the elbows locked against the body or the splash pan for stability, using the entire upper body to maintain steady pressure rather than relying solely on arm strength.
As the clay begins to rise into a dome, the potter may notice small wobbles. These indicate that the mass is not yet centered. Instead of trying to correct the wobble by squeezing harder, one can adjust the angle of the hands or the point of contact. Many potters find it helpful to let the clay rise and fall several times—a technique sometimes called “coning up and down”—to redistribute the moisture and align the particles. Each time the clay is pushed down, the water is worked outward, and the mass becomes more homogenous. The process is complete when the clay spins without visible deviation and feels rock-solid under the hands. A simple test is to gently touch the top of the column with a finger; if the clay stays perfectly still while the wheel spins, centering has been achieved.
Preparing for Opening: The Final Centered Shape
Once the clay is centered, it is often shaped into a low, wide dome or a squat cylinder, depending on the intended form. For most bowls and cylinders, a dome with a slightly flattened top provides a good starting point for opening. The potter applies a small amount of water to the top of the clay, using a sponge or wet fingers to lubricate the surface without saturating it. At this stage, the wheel speed may be reduced slightly to provide more control during the opening motions. It is crucial to keep the hands and clay evenly moist; dry spots create friction that can tear the clay or cause it to wobble again.
Some potters use a chamois or a rib to refine the surface before opening, but for beginners, simply smoothing the top with a wet thumb can suffice. The goal is to create a clear, level platform that will guide the opening tool. Any unevenness here will be magnified as the form grows. Therefore, taking time to ensure the centered mass is truly level and symmetrical pays dividends later. Observing the reflection of light on the wet clay can help spot subtle irregularities.
Opening the Form: Methods and Considerations
Opening is the moment when the centered clay becomes a vessel. The standard approach is to press the thumb or a finger into the very center of the dome, aiming for a depth that leaves about half an inch of clay at the bottom for a typical piece. The pressure should be gentle but firm, and the finger should be held steady as the wheel rotates, allowing the clay to move around it rather than pushing the finger off-center. Many throwers prefer to start with a small opening and then widen it gradually using the side of the finger or a wooden opening tool. The key is to maintain a constant thickness at the bottom, which will become the floor of the pot.
After the initial depression, the potter can begin to pull the clay outward with the inside finger while the outside hand supports the wall. This creates a wide, shallow bowl shape, often called “opening out.” It is important to keep the bottom thickness consistent—if the finger is angled downward, it may dig into the floor and create a thin spot that could later crack or collapse. One useful technique is to measure the bottom thickness periodically with a needle tool or by feeling the indent on the outside. Water should be used sparingly during this stage; excessive water can undermine the clay’s structure. Instead, a sponge can be used to remove excess slurry and keep the surface workable.
Transitioning from Opening to Building Walls
The opening phase naturally leads into the first pull of the walls. As the clay is opened outward, the rim becomes thinner, while the floor remains thick. This is the ideal moment to begin the initial upward pull. The inside hand (typically the fingers of the left hand) applies outward pressure against the inside wall, while the outside hand (the right hand) supports the exterior with an upward and inward motion. The two hands work together to lift the clay evenly. The wheel speed may be increased slightly to assist the lift, but not so fast that control is lost.
At this stage, many beginners encounter a common issue: the clay begins to twist or warp because the opening was not centered properly or because the floor is too thin. If this happens, it may be necessary to stop, compress the bottom with a rib, and recenter the mass before attempting the pull again. Pushing through wobbles often leads to catastrophic failure. Instead, it is better to recognize the signs of instability early and return to the centering step. Building patience into the process is a skill in itself. The first pull should not aim for height; it should aim for even thickness and alignment. Once the walls are consistent, subsequent pulls can raise the form gradually.
Common Challenges and How to Approach Them
Several recurring challenges arise when learning to center and open clay on the wheel. One of the most frequent is the “donut effect,” where the clay collapses into a ring with a deep hole in the center. This usually happens when the opening finger is not kept in the center or when the walls are pulled too thinly at the very beginning. To address this, the potter can practice keeping the opening finger absolutely still as the wheel spins, relying on the rotation to do the work. Another challenge is the clay becoming dry and cracking on the rim. This can be managed by maintaining a spray bottle or a damp sponge nearby and by sealing the clay in plastic between sessions.
Centering problems also manifest as a persistent wobble that returns after the form has been opened. The wobble may originate from an unevenly wedged mass or from inconsistent hand pressure during centering. Rather than becoming frustrated, the potter can view this as feedback from the material. Adjusting the speed of the wheel, re-wetting the hands, or changing the angle of approach can often bring the clay back into alignment. At Clay Muse, the philosophy is that every misstep provides information for the next attempt. Over time, the body learns to recognize the subtle vibrations and sounds that indicate a centered mass, and opening becomes a fluid, intuitive motion. Mastery does not come from avoiding mistakes, but from developing the ability to respond to them calmly and methodically.